Integration Journey
Integrating with SmartPay enables seamless payment processing by leveraging our APIs and SDKs. This guide provides a structured approach to integrating SmartPay into your platform, from initial setup to going live.
Authentication
SmartPay solution supports strong API authentication.
In order to authenticate within the SmartPay APIs, you will need to provide the standard Authorization header in every request. SmartPay supports the Basic authentication scheme in accordance with RFC standard.
The value to be passed in the header is base64-encoded credentials containing your merchantKey as username and authenticationKey as password.
MerchantKey and authentication key will be provided by your dedicated Product Solution Specialist.
Header:
Authorization: Basic <base64(merchantKey:authenticationKey)>
Custom headers
IDKit token
Identity Kit token authentication is supported in SmartPay APIs. This is an optional header, and if sent in the API request, it should be sent with a valid JWT token, as below:
| Header name | Type | Length | Mandatory |
|---|---|---|---|
| X-Access-Token | JWT | 512 | No |
Guest Payment
Guest payments enable end users to provide their payment option details for each payment i.e., the payment option is not persisted (tokenized) and not associated with an account.
Payment Credential Vault Based Payment
SmartPay supports tokenization, allowing customers to store payment credentials for future transactions. Payment Credential Vault based payments enable end users to persist (tokenize) their provided payment option details so that these can be re-used without needing to be entered as part of future payments.
Including the Customer Account ID as part of the Create Checkout API call indicates to SmartPay that the transaction in question should be processed using a payment credential vault. If a vault does not exist for the customer, SmartPay automatically creates one and securely associates it with the provided Customer Account ID. If a vault already exists, SmartPay retrieves and displays any previously stored (tokenized) payment options in the widget, allowing the customer to select a saved payment method for a faster checkout. This feature enables seamless repeat transactions.
We recommend setting a minimum timeout of 90 seconds, even though API requests are expected to return a response much faster.
Having a 90 second timeout interval allows handling of delays dependent on different queries and responses from external systems and payment providers.
Process Flow
The SmartPay integration follows a structured payment flow that ensures secure processing and real-time transaction validation. Below are the key steps involved:
1. Initialize Payment Request
Your server initializes a new payment, requesting a
Transaction IDandCheckout Tokenby calling the SmartPay API methodCreate Checkout. This request can be for a one-off guest payment without theCustomer Account IDspecified, or for a registered customer where an existing or newCustomer Account IDis provided. The request must include theMerchant Keyfor authentication.2. Forward Checkout Token to Client
Once the
Create CheckoutAPI response is received, your server extracts theCheckout Tokenand sends it to your client for initialization of the SmartPay Widget. This is needed to securely handle the collection of payment details within the customer's browser or mobile application.3. Customer Submits Payment via SmartPay Widget
The client application initializes the SmartPay Widget using the
Checkout Token, allowing the customer to securely submits their payment information. The SmartPay Widget transmits this information securely to the acquiring bank or payment provider, ensuring PCI-compliant processing. Once the payment is submitted, the widget triggers a JavaScript callback to notify the client application of the payment result.4. Client Triggers Server-Side Verification
After receiving the JavaScript callback, the client application forwards the transaction details to the backend server for verification. This step ensures that payment validation is handled securely through a server-to-server API call, rather than solely relying on client-side confirmation.
5. Retrieve and Verify Payment Status
Your backend calls SmartPay's
Get Payment Statusand verifies the transaction status by providingTransaction IDreceived in Step 1 to confirm whether the payment was authorized, captured, or failed. If the status is pending, the server may reattempt verification until the transaction is completed.
Create Checkout
The complete checkout process utilizes the single API request Create Checkout with the following structure.
The sample below shows checkout for a guest payment credit card transaction. Please refer to our API documentation for full explanation of this API method.
Request
Path:
POST {Base URL}/payment/creation
Header:
Content-Type: application/json
Accept-Language: en-US
Origin: { Origin }
User-Agent: { User-Agent }
{
    "merchantKey": "48c4e923-e88c-464b-a4e7-ccb2c6d3775e",
    "payment": {
        "amount": 10.99,
        "currencyCode": "EUR",
        "description": "Purchase 1x product ABC"
    },
    "consumer": {
        "firstName": "Butcher",
        "lastName": "Hells",
        "emailAddress": "hells.butcher_001@mail.com",
        "dateOfBirth": "1985-04-05"
    },
    "billingAddress": {
        "addressLine1": "Anystreet",
        "number": "123",
        "city": "Anycity",
        "postCode": "12345",
        "county": "Anycounty",
        "countryCode": "DE"
    }
}
The Create Checkout response includes the 36-character GUID of the transaction-ID which can be used for further modification and status APIs and 512 bits checkout token required for front-end widget rendering.
For transactions using Apple Pay or Google Pay™, please consult the respective integration pages for details on required domain configuration and button styling parameters within the object criteria.
SmartPay API responses now include an ignoredProperties array in the response body, identifying any unused properties that were submitted but not recognized and therefore ignored. The ignoredProperties array is included in both success and error responses for all public API methods that accept a request body. This ensures that merchants are informed about unprocessed fields in their submissions, improves debugging and reduces potential issues in integration. Requests will continue to be processed successfully even if unrecognized fields are included, as long as all mandatory validations are fulfilled.
Response
{
    "transactionId": "fc10f767-12a7-46d0-9da0-4af6b5b67c4d",
    "checkoutToken": "KwlJmj1QoJL4oFPaCYnNCTW8cC8ZsLvQg16erCzx7hlU0rxLi3TdAKBLAN6md2Ik",
    "paymentStatus": "CREATED",
    "requestTime": "2023-04-05T13:25:41.790Z",
    "ignoredProperties": [
        "consumer.dateOfBirth",
        "billingAddress.county"
        ]
}
The transactionId and checkoutToken should be associated and persisted with any given business transaction within the integrated solution, e.g., paying for the goods in a shopping cart during checkout may have one or more transactionId and checkoutToken pairs associated with it as a user attempts to pay using different payment options. This should be accessible to support staff and initially testers to submit any service requests relating to the integration process to help speed up the analysis.
SmartPay API responses now include an ignoredProperties array in the response body, identifying any unused properties that were submitted but not recognized and therefore ignored. The ignoredProperties array is included in both success and error responses for all public API methods that accept a request body. This ensures that merchants are informed about unprocessed fields in their submissions, improves debugging and reduces potential issues in integration. Requests will continue to be processed successfully even if unrecognized fields are included, as long as all mandatory validations are fulfilled.
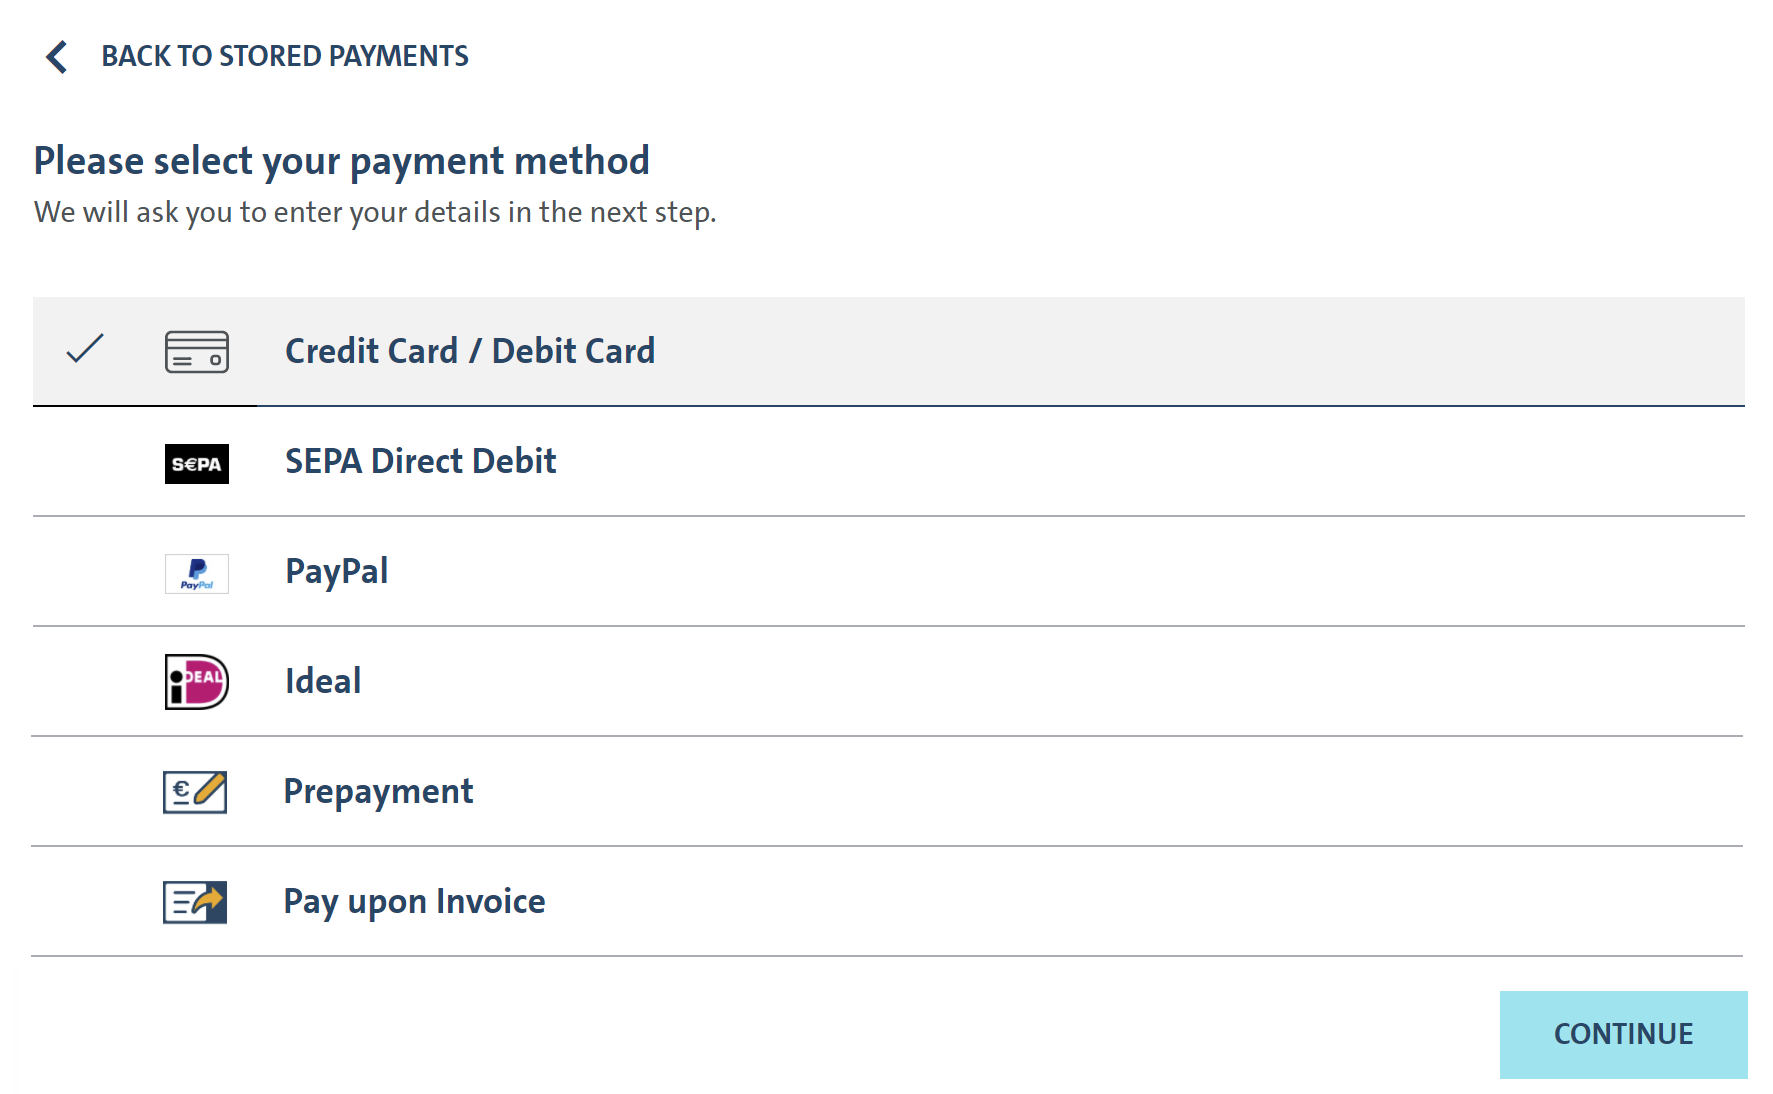
Render SmartPay Widget
Our SmartPay SDKs are made up of light-weight libraries which allow you to securely collect payment option details. This approach maintains a SAQ-A compliant payment-form solution while enabling you to build forward compatible web or mobile experiences which seamlessly combines your corporate identity with the required functionalities whilst adding some additional ancillary functions to ease integration. The SmartPay Checkout Web SDK supports both single-page and multi-page web website architectures, offering flexibility for different frontend implementations.
Web Checkout
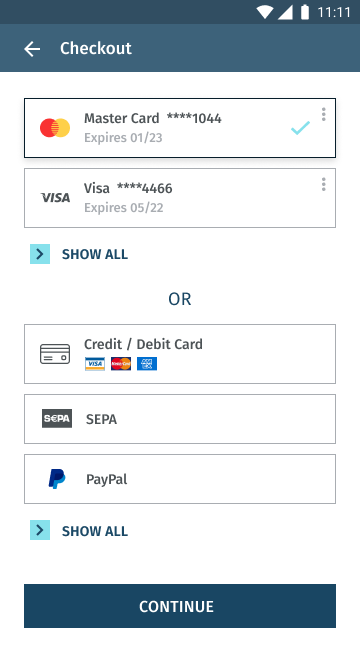
Mobile Checkout
For more details, please refer to the documentation:
Mobile checkout is currently in beta phase. If you are interested to use our native iOS/Android SDKs, please reach out to your Product Solution Specialist.
Get Payment Transaction Status
The Widget returns you the result of the submitted payment via successHandler or errorHandler JavaScript callbacks. This should be the trigger for your server (backend) to call the SmartPay API method Get Payment Status to verify the status of the transaction as depicted in the example below.
Request
Path:
GET {Base URL}/payment/status/48c4e923-e88c-464b-a4e7-ccb2c6d3775e
Header:
Content-Type: application/json
Accept-Language: en-US
Response
{
    "transactionId": "48c4e923-e88c-464b-a4e7-ccb2c6d3775e",
    "reconciliationReferenceId": "zKZhOVjJitCdHdJzicGmI",
    "description": "Purchase 1x product ABC",
    "paymentStatus": "CAPTURED",
    "creationDate": "2020-12-15T13:49:36.556Z",
    "transactionOverview": {
        "amount": 10.99,
        "currencyCode": "EUR",
        "mit": false,
        "transactionId": "48c4e923-e88c-464b-a4e7-ccb2c6d3775e",
        "paymentMethod": "CARDS",
    },
    "modifications": []
}
Evaluate the response parameter "paymentStatus" which should be:
AUTHORIZATION_COMPLETEDif the transaction was successfully authorized (auto-capture = off or delayed)CAPTURED" if the transaction was successfully captured (auto-capture = on or capture API called)AUTHORIZATION_PENDINGorCAPTURE_PENDINGif it the was not synchronously completed
Where this is not the case, please log/store in your administrative/support console the full response for later analysis.
Our customer support especially requires:
transactionIdreconciliationReferenceIdpaymentStatuscreationDate
Please note: PENDING states may occur if the payment provider is not supporting synchronous processing (currently only PayU) or if a payment provider is not responding in time. In such cases, SmartPay automatically attempts to retrieve the final confirmation from the payment provider, so that the pending state will be resolved in a timely manner. If you receive a PENDING status retry the get payment status call up to three times within 3 minutes and log an error if the status is not changed.
For a complete list of endpoint specifications and data schemas, please refer to the SmartPay API-Reference.