Bacs
Introduction
Bacs (Bankers' Automated Clearing System) is a UK-based inter-bank payment processing network that supports two primary types of transactions:
-
Direct Credit: Payments initiated by the debtor (e.g., a customer or buyer) for purposes such as consumer-initiated purchases and money transfers such as refunds or reimbursements. Direct Credits are commonly also used to make periodic salary or pension payments.
-
Direct Debit: Payments initiated by the creditor (e.g., a merchant or service provider) for recurring payments like utility bills, taxes, or subscription fees.
- To initiate Direct Debits on behalf of a customer, merchants must secure upfront authorization via a legally binding Mandate Contract known as a Direct Debit Instruction (DDI).
- A DDI, or mandate, is an agreement between a customer and a merchant that authorizes the merchant to initiate future payments directly from the customer's bank account.
- This mandate can be established either in paper form or digitally, with digital mandates relying on Open-Banking technology and Account Information Services for secure, streamlined setup.
J.P. Morgan Mobility Payments Solutions S.A. supports Bacs mandate registration and payment processing, using a unique JPM Creditor Identifier. The customer must first create a Bacs mandate as part of the Bacs registration process to store Bacs as a payment option, enabling JPM MPS to process payments triggered by the merchant. Although JPM MPS acts as the creditor in the contract, the collected funds are later transferred to the ultimate merchant or service provider.
Key Points for Bacs Payments via SmartPay
-
Valid Mandate Requirement: A valid DDI is required for successful payment processing. The DDI setup includes authentication through the open banking platform's Account Information Service, allowing the customer's bank to validate bank details securely. The DDI, once created, is visible to the customer in their stored payment options but remains inactive until fully processed.
-
Pre-Notification: Merchants must notify customers before each payment unless a pre-established payment schedule has been provided in advance. This enables the customer to anticipate charges for the agreed services or goods.
-
Mandate Cancellation: Customers can cancel their mandate at any time by contacting either the merchant or their bank.
-
Processing Times: Setting up a new mandate typically requires up to seven business days (an average of five days), while payment processing takes approximately three business days.
-
Dispute Resolution: Customers have the right to dispute payments through their bank with no time limitations. Bacs Direct Debit disputes are final and cannot be appealed.
-
Transaction Currency and Location: Bacs payments are processed exclusively in GBP (British Pound), and the customer must be located in the UK to use Bacs payment services.
-
Registered Customers Only: Bacs payments through SmartPay are restricted to registered users; guest payments are not supported.
Recommended steps for new integrations: For new integrations, particularly if you are not already using SmartPay, we recommend familiarizing yourself with our general integration guides for subscription and customer-initiated transactions.
For detailed guidance on integration requirements, contact your assigned Product Solution Specialist.
Merchant Process Flow for Bacs Payments
Step 1: Bacs Mandate Integration
The merchant has to ensure access for the customer to agree to services and/or enabling consumers to add a new payment option for setting up a Bacs mandate.Step 2: Mandate Processing and Activation
Customers have to register the mandate themselves. Once registered, a mandate will appear inactive (faded or dimmed as a payment option in the frontend) until activation.Step 3: Payment Execution
Merchants process the Bacs payment as per the mandate and pre-notified schedule.
Integration Journey
This guide provides a comprehensive approach to implementing Bacs mandate registration and payment processing through SmartPay. It includes steps to decouple the mandate registration from the payment transaction process for a smoother user experience, as well as an alternative registration flow.
Bacs Mandate Registration for SmartPay
1. Bacs is added as a Payment Method in your Payment Options pages
The customer should have the ability to press the button for adding a new payment method, for example, "Add new payment method" or "Register Bacs mandate" (for more information on, visit Decoupled Mandate Registration).
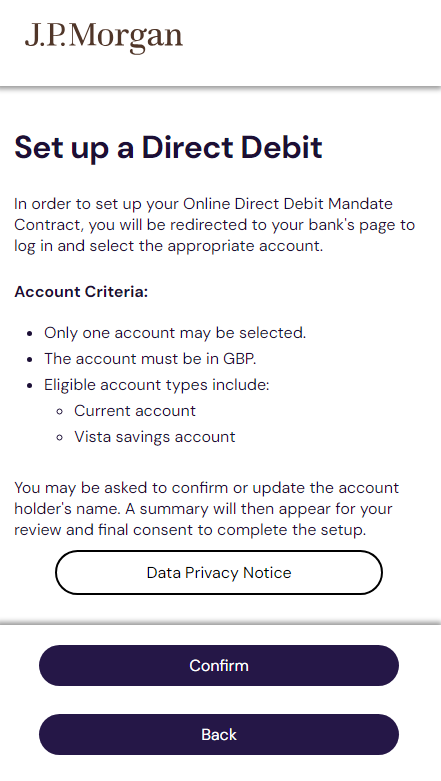
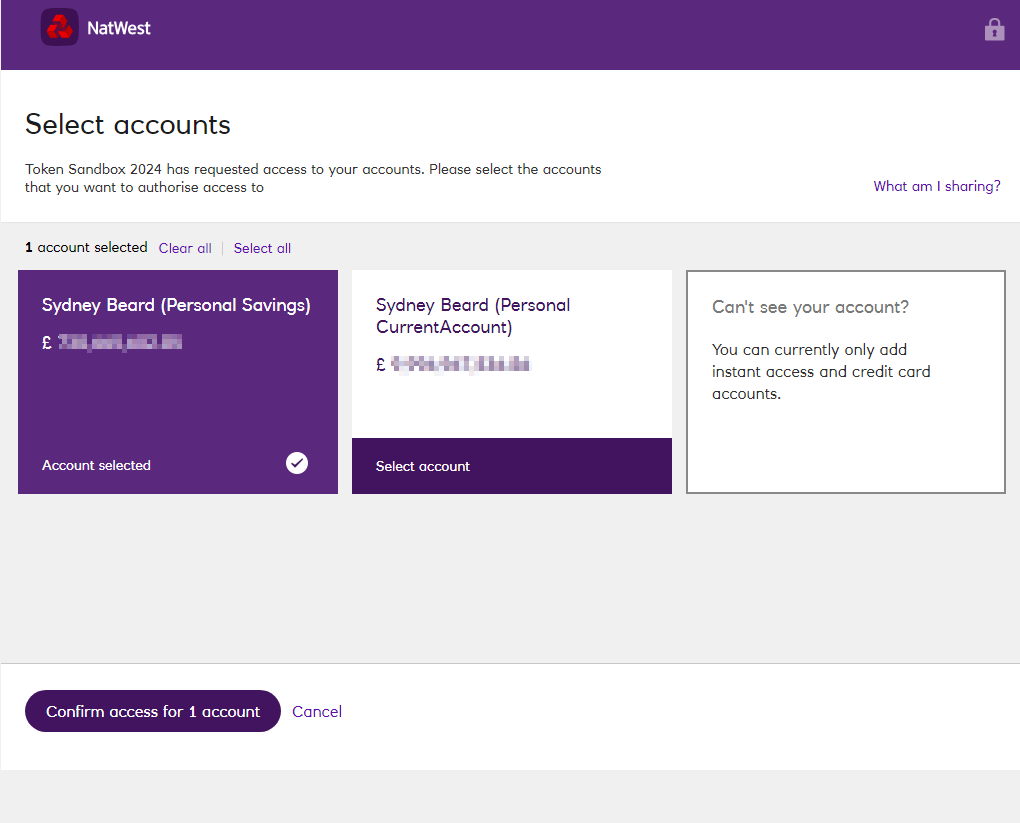
2. Selecting Bacs Payment Option
Once Bacs payment method is activated, the customer can initiate mandate registration. This redirects them to a hosted consent page where they must authorize the use of their account for mandate creation. It is important to note that only one account can be selected, it must be in GBP, and either a current account or Vista savings account.
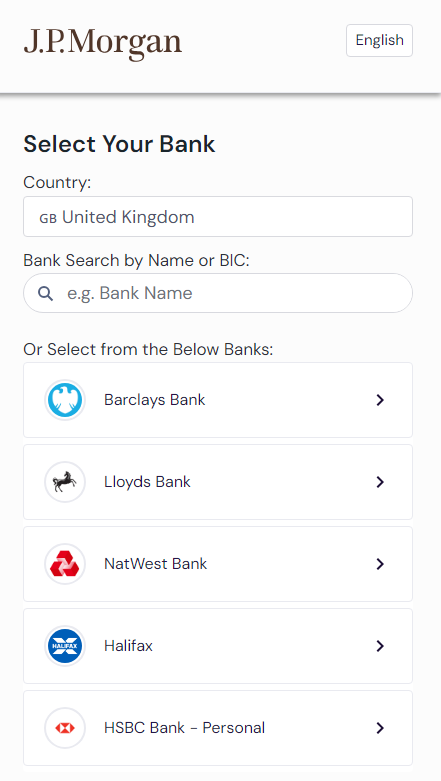
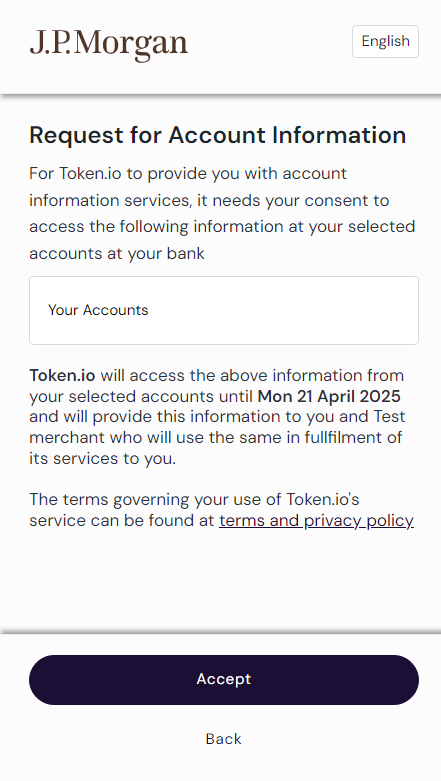
3. Bank Selection and Account Information Service Acceptance
The customer selects their bank and consents to using the Account Information Service, allowing SmartPay to access necessary account details for the mandate setup. Account Information Service (AIS) is a financial service regulated under the EU's PSD2 that enables third-party providers to access and retrieve consolidated account data from multiple financial institutions.
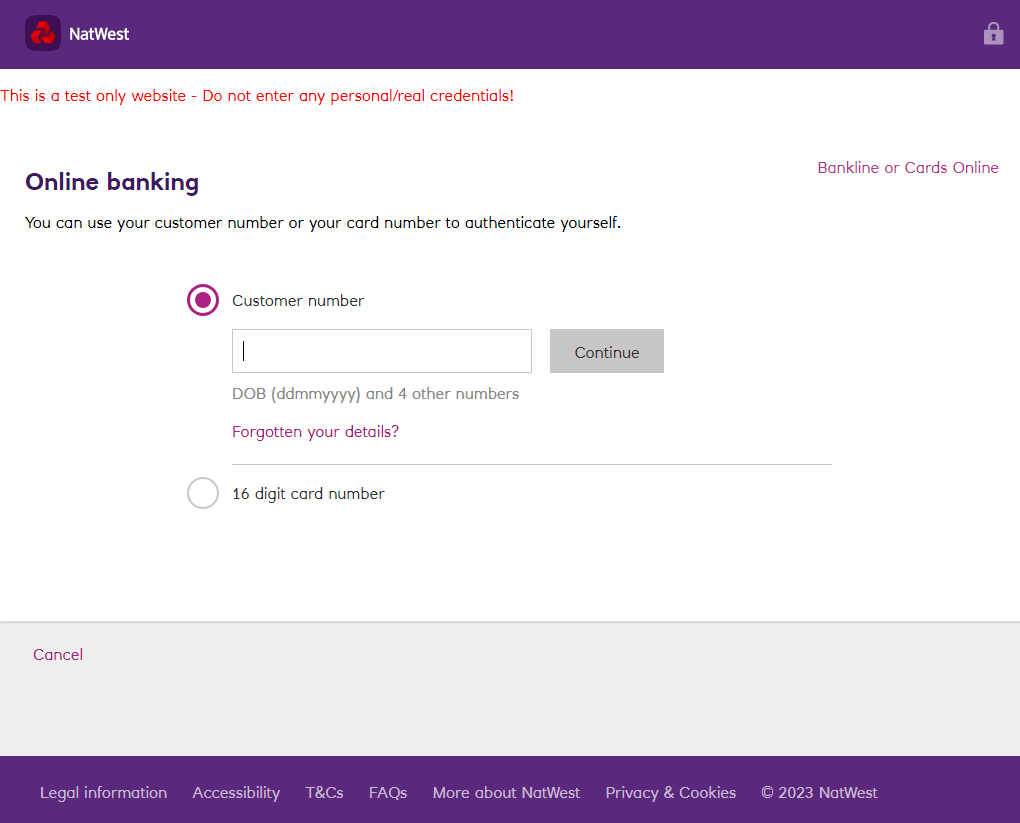
4. Online Banking Login and Authentication
The customer is redirected to their bank's online portal, where they enter their credentials. The bank then validates these details and authorizes the transaction. Strong Customer Authentication (SCA), controlled by the customer's bank, is required as an additional verification measure and may include multi-factor authentication or a one-time password.
5. Selecting Bank Account for Mandate
After successful login and authentication, the customer chooses the bank account they wish to use for the Bacs mandate. Only one account may be selected, in GBP, and either a current account or Vista savings account.
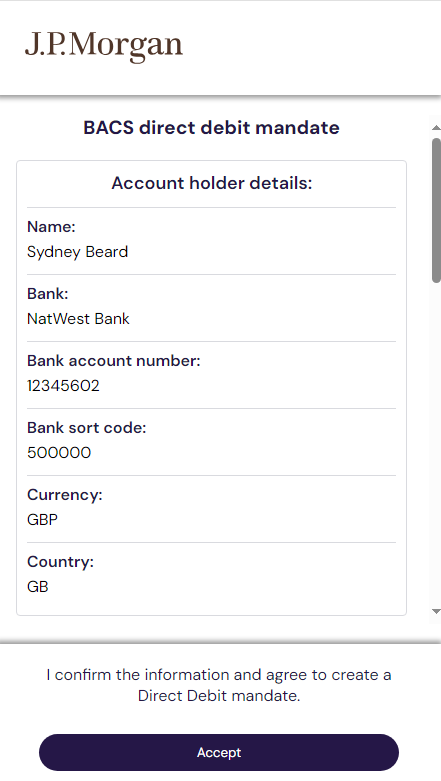
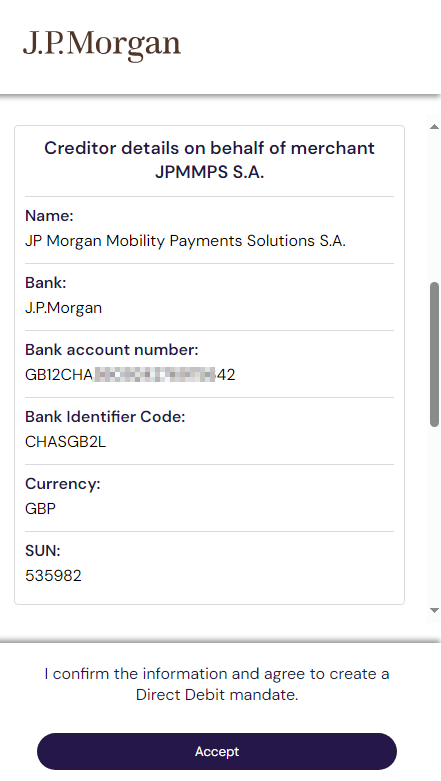
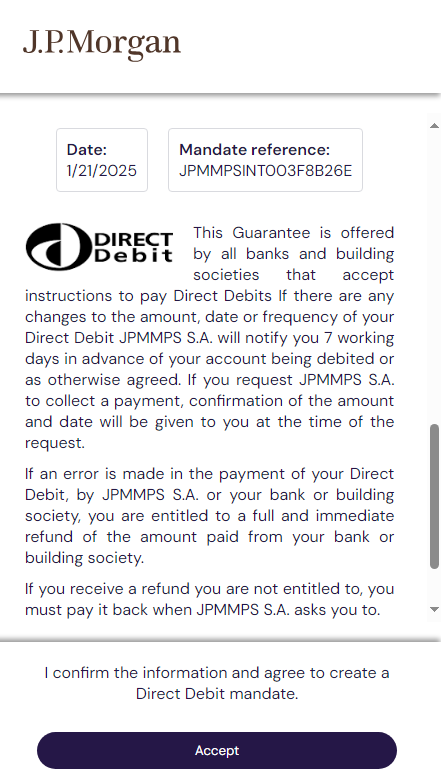
6. Mandate Confirmation
The Bacs mandate is created, and the customer is shown the mandate details. They agree to the terms and conditions and accept the mandate. JPM MPS always acts as the creditor in the payment process. Direct Debit standard consent is also needed in the last step.
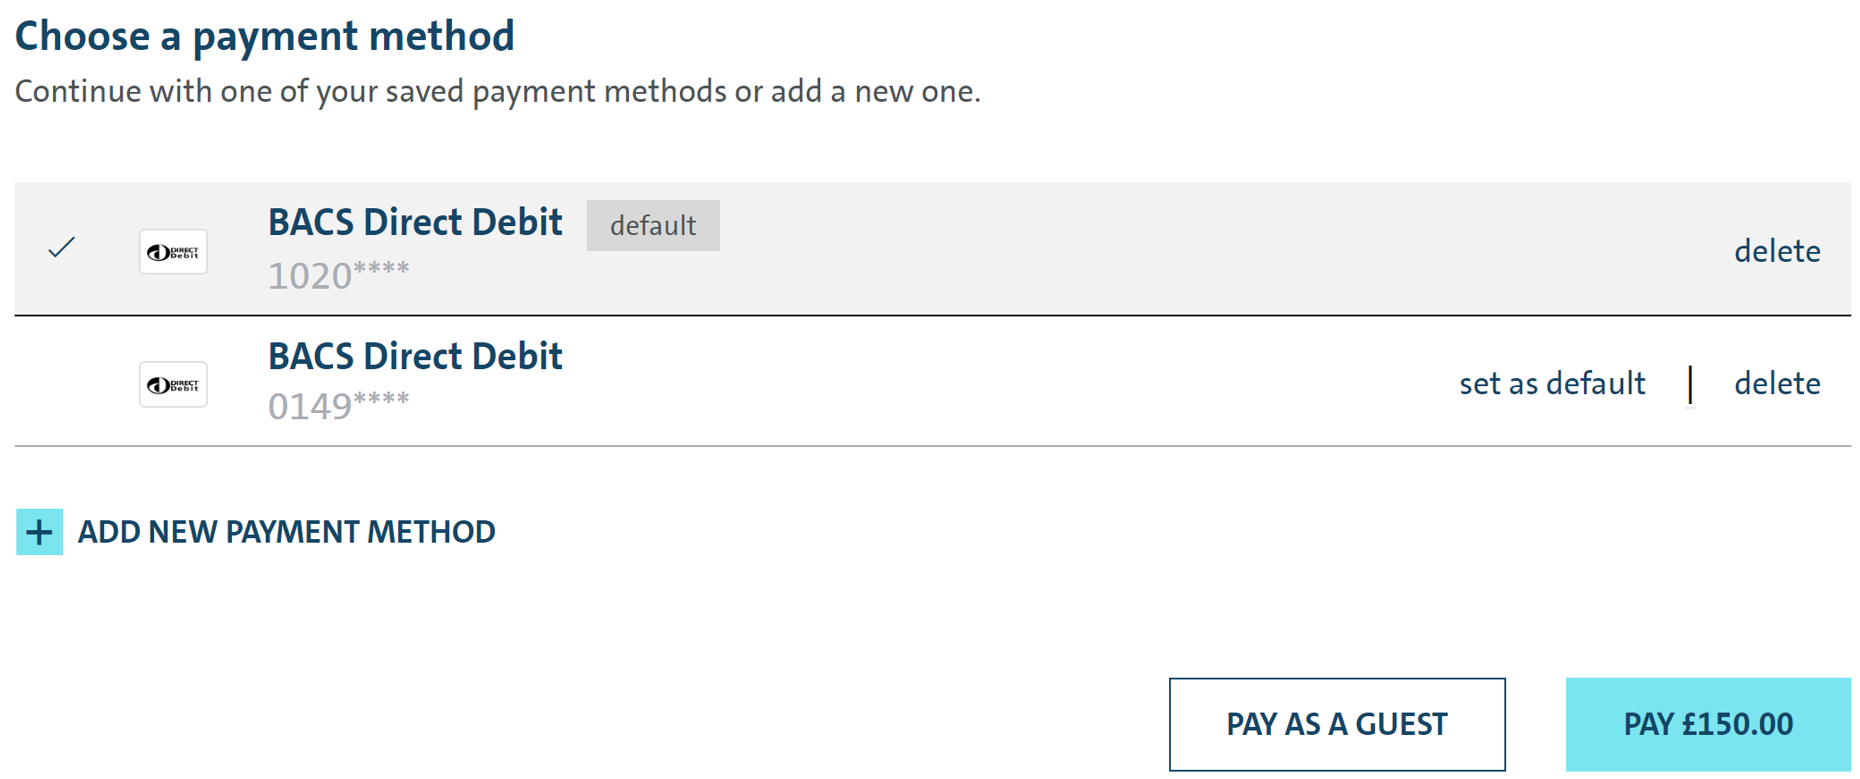
7. Return to Checkout Page and Confirmation Message
The customer is redirected to the main screen, where Bacs is now visible as a stored payment method, but is faded or dimmed and unavailable for usage. After pressing "Continue," the mandate has been successfully created, but is in an inactive status, indicating it is not yet ready for payments.
To complete the process, merchants need to capture the JavaScript notification to confirm mandate creation and non-active status (refer to the Integration Journey section for notification handling details).
Decoupled Mandate Registration for Bacs
Since Bacs mandates can take up to seven business days to activate, it is recommended to implement a decoupled mandate registration process. This allows customers to register Bacs as a payment option without associating it directly with an item in their shopping cart.
In cases where Bacs mandates require longer processing times, we suggest a dedicated registration flow separated from the payment flow, so customers are informed that Bacs mandates cannot be used immediately for payments.
We recommend providing a dedicated registration journey (for example, by adding a "Register Bacs" button after the customer selects an invoice) due to the time required for Bacs mandate activation. This approach separates mandate registration from payment workflows, helping customers understand that Bacs may not be immediately available.
Merchants can improve the user experience by offering this separated workflow. This distinction allows them to track the registration flow and notify customers once Bacs is fully activated and ready for use. Additionally, customers gain the convenience of having their Bacs payment option stored and accessible across multiple payment workflows.
-
Initialize the SmartPay Widget: The merchant server initiates the SmartPay Widget by requesting a checkout token from the Create Subscription Checkout API. Set the amount to zero, as no transaction amount is needed for mandate creation.
-
Mandate Creation: Once the widget appears, the customer adds Bacs as a stored payment option by signing the mandate (see details in the Integration Journey). Upon signing, a store payment option reference is generated.
-
Fetch the Payment Option Reference: After completing the registration journey, a JavaScript notification is triggered to alert the merchant. This allows retrieval of the stored payment option reference using a success handler such as:
{
    "kind":"ADD_METHOD_CALLBACK",
    "message":"Subscription created successfully.",
    "transactionStatus":"SUCCESS",
    "storedPaymentOptionReference":"qB62***MasIMg"
}
Additional mandate details can be retrieved via Get Payment Option API by providing the stored payment option reference.
-
Post-Registration Message: After the customer signs the mandate, they are redirected to the main screen. The merchant needs to parse the JavaScript message and display a success notification to inform the customer that the mandate has been created but is still in a non-active status.
-
Error Handling on Continue Button: When the customer clicks "Continue" after registering, any JavaScript errors should be displayed to the customer. For example:
{
    "code":"BACSDD",
    "name":"payment-method:BACSDD",
    "subscriptionId":"j8DQmSI53BApepri***lniVlR7YFKZoGHv9R6",
    "isDefault":true
} -
Wait for Activation: Unlike SEPA Direct Debit, a Bacs mandate is only ready for payments upon activation, and merchants are notified when this occurs.
Alternative Bacs Registration Flow
For scenarios requiring initiation of a payment series without an immediate mandate:
-
Create the Payment Series: Begin by calling the Create Payment Series API without providing a reference to a stored payment option (SPO). This allows the payment series to be created without associating it immediately with a mandate.
-
Initialize Subscription SDK with Bacs Registration: Retrieve the "id" from the API response in Step 1. Use this "id" to initialize the Subscription SDK, adding the SPO in the widget. This triggers the Bacs registration process, allowing the customer to complete the registration via the widget. At this stage, both the Bacs payment option and mandate are linked to the payment series created in Step 1, ensuring they are ready for future transactions.
-
Initiate Payment Series Transaction: Finally, call the Payment Series Transaction API to process the payment. If the Bacs mandate is inactive, an error will be returned, and the transaction will not proceed.
For a comprehensive overview of the Bacs registration flow and the steps involved on the frontend, refer to the Bacs Registration User Journey section above.
Mandate Status
The initial status for a completed mandate registration is REGISTERED. Merchants should anticipate changes to the following statuses:
ENABLED: Mandate successfully processed and activated.DISABLED: Mandate deactivated.REJECTED: Mandate unsuccessfully processed and rejected.
Stored Payment Option (SPO) status is directly linked to the mandate status. The status of the Stored Payment Option determines whether transactions can be processed:
- Active: A stored payment option is considered active when its associated mandate has the status
dd.mandateStatus = ENABLED, allowing transactions to be processed.
- Inactive: A stored payment option is inactive if
dd.mandateStatushas the status ofREGISTERED,DISABLED, orREJECTED, preventing further transactions from being processed.
If a merchant attempts to process a Merchant-Initiated Transaction (MIT) using an inactive mandate, the API will return an error.
Notifications Mandate Lifecycle
-
Initial Registration Status: After registration, the mandate status is set to
Registered. Merchants receive notifications via JavaScript and the Payment Option Webhook when the mandate status changes. -
Webhook Details: The webhook does not include the status itself; merchants need to use
ObjectId(stored payment option reference) andcustomerAccountIdto fetch the status from Get Payment Options API. -
Recommended Customer Communications:
- Activation Timelines: Notify customers that activation takes up to seven days (on average, five), and payment processing takes approximately three days.
- Mandate Enabled/Disabled: Inform customers of changes in mandate status via frontend notifications, email, or push notifications.
-
Prepayment Notifications: For merchant-initiated transactions, it is mandatory for merchants to implement prepayment notifications, unless a scheduled payment plan is provided in advance. Since MPS does not handle prepayment notifications, it is advised that merchants proactively inform customers about upcoming transactions. In case a scheduled payment plan has already been communicated to the customer, additional prepayment notifications may not be necessary.
-
Mandate Cancellation:
- Customer-Initiated Deletion: If a customer deletes a Bacs mandate via the widget, no webhook status change event is sent. The store payment option is deleted and will no longer appear in the Get Payment Options response. For mandates linked to a payment series, implement an
onBeforeDeleteSpohandler to restrict deletion as needed. - Bank-Initiated Cancellation: If a customer cancels the mandate through their bank, a webhook with a status change is sent, updating the mandate status to
Disabled.
- Customer-Initiated Deletion: If a customer deletes a Bacs mandate via the widget, no webhook status change event is sent. The store payment option is deleted and will no longer appear in the Get Payment Options response. For mandates linked to a payment series, implement an
Payments with Bacs Mandate
Please note that J.P. Morgan Mobility Payments Solutions S.A. is used as Creditor in payments. Once activated, the Bacs mandate is ready for use in Customer-Initiated Transactions (CIT), regular Merchant-Initiated Transactions (MIT) and MIT Payment Series.
CIT Payments
-
Start with the Create Checkout API and follow the CIT integration steps outlined in the Integration Journey.
-
If the mandate is active, the customer can select Bacs and proceed with payment.
-
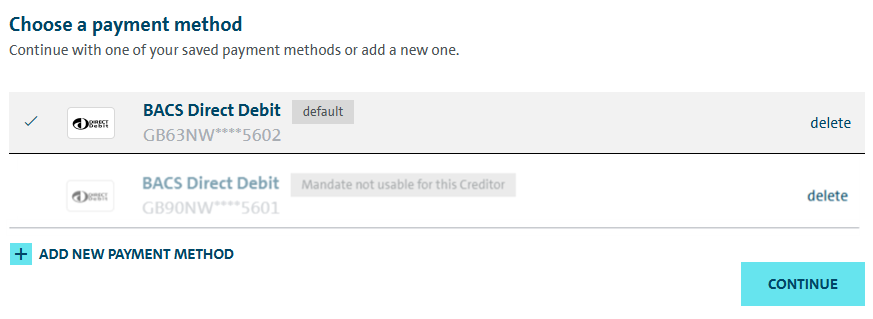
If the mandate is inactive, the widget will display available payment methods, with the inactive Bacs option appearing as faded or dimmed. Attempting to use an inactive mandate triggers a JavaScript error:
{
   "kind":"ERR_PAYMENT_CALLBACK",
   "message":"Payment failed during Authorization or Capturing. This is a hard failure. Retry: No"
   }
MIT - Standard SmartPay Payments
- All Merchant-Initiated Transactions (MIT) follow the same integration process. For details, please refer to the MIT Integration Journey.
MIT - Payment Series Payments
-
Begin by creating a Payment Series using the Create Payment Series API and providing the stored payment option reference in
billingAgreement.storedPaymentOptionReferenceif a Bacs mandate is already stored. -
To retrieve the stored payment option reference, please refer to the Mandate Registration.
-
If the customer does not have Bacs stored, create a Payment Series without the stored payment option reference without including
billingAgreement.storedPaymentOptionReferenceand use the Subscription Widget to prompt the customer to register Bacs. Once the Payment Series is created, the merchant then triggers a Payment Series Transaction. Follow the same integration steps outlined for Create Payment Series API.
Error Handling
Bacs payments require an active mandate, and any transaction attempt will fail if the mandate is inactive. To avoid payment failures, merchants must verify the mandate's status before processing a merchant-initiated transaction or renewing a subscription. If the mandate is inactive or removed, SmartPay will return a specific error response indicating whether activation is required or if a new billing agreement must be created. By anticipating these error scenarios, merchants can effectively manage mandate-related failures, minimize transaction declines, and ensure a smooth payment experience for customers.
The examples provided below cover the most common error scenarios, but merchants may receive different error messages based on transaction conditions and the mandate's status.
Checking Mandate Status Before Processing Payments
Merchants should check the mandate status before initiating a payment to avoid errors. This can be done using the GET Payment Options Reference API which retrieves details about a stored payment option, including the status of the mandate.
If the mandate reference is inactive, do not attempt an MIT transaction. If a merchant triggers an MIT payment while the mandate is inactive, SmartPay will return an error indicating that the SPO cannot be found:
{
   "traceId": "traceId-65bd***7a05",
   "errors": [
    {
          "message": "Payment option with reference 'L03GdE***YeM6A' not found for customer account 'test@mail.com'.",
          "code": "invalid_stored_payment_option_reference"
    }    ]
}
If the mandate is in the DISABLED status, SmartPay will return this error message:
{
"message": "Stored payment option reference does not belong to customer account."
}
If the mandate is pending activation, please ensure the customer has completed all required authorization steps. Then retry the transaction after the mandate is confirmed as active. If the mandate is cancelled or rejected, inform the customer that a new mandate authorization is required. Do not attempt further MIT payments with the inactive mandate.
Handling Subscription-Based Payment Series
When processing payments linked to a subscription, merchants must ensure that the associated mandate is active. If the mandate is inactive or deleted, SmartPay will return specific error responses indicating the issue.
New Mandate Creation
When a customer creates a new mandate, the merchant must generate a corresponding payment series linked to that mandate. If the merchant attempts to process a payment before the mandate is active, the transaction will fail, and SmartPay will return an error response.
{
    "id": "TransactionLog-eed70346-4e87-48e5-ba7b-087201e6d945",
    "createdAt": "2025-03-06T11:23:11.01Z",
    "updatedAt": "2025-03-06T11:23:11.01Z",
    "status": "failed",
    "description": "Transaction with modificationId: b4cd*** fails on its 0 resubmit
                    because smartpay returned failure status for transaction",
    "error": "gateway_processing",
    "errorDetails": {
        "gatewayDescription": "External payment provider failed"
            }
}
Please refer here for the full example of Create Payment Series transaction.
Request
Path:
POST {baseURL}/payment-series
Header:
Content-Type: application/json
Accept-Language: en-US
Origin: { Origin }
User-Agent: { User-Agent }
x-api-key: { merchantKey }
      {
          "amount": "25",
          "description": "OrderId-002800",
          "customReferences":{
          "custom1":"Test"
          }
      }
Response
      {
          "id": "Transaction-1b028132-3fed-42f0-8eb9-5dfa56dd2d79",
          "transactionReferenceId": "f2502387-745b-41f8-94f7-8c9d3fa1dce7",
          "reconciliationReferenceId": null,
          "customerAccountId": "000000411899",
          "storedPaymentOptionReference": "n0FeAaUWQ8540PDjaMKO2",
          "modificationId": "b4cd396b-ca06-46d6-9458-d58463d30586",
          "paymentStatus": "failed",
          "payment": {
              "description": "OrderId-002800",
              "amount": 25.00,
              "currencyIsoCode": "GBP"
          },
          "billingAddress": {
              "addressLine1": "Leopoldstrasse",
              "addressLine2": null,
              "addressLine3": null,
              "number": "244",
              "city": "Munich",
              "postCode": "80807",
              "countryCode": "DE",
              "state": null
          },
          "shippingAddress": {
              "addressLine1": "Leopoldstrasse",
              "addressLine2": null,
              "addressLine3": null,
              "number": "244",
              "city": "Munich",
              "postCode": "80807",
              "countryCode": "DE",
              "state": null
          },
          "consumer": {
              "firstName": "TEST CONSUMER",
              "lastName": ".",
              "middleName": null,
              "emailAddress": "test@email.de",
              "title": "Mr",
              "culture": "en-en",
              "dateOfBirth": "1995-01-26",
              "gender": "M",
              "mobilePhone": "1234567890",
              "homePhone": "1234567891",
              "workPhone": "1234567892",
              "taxId": null
          },
          "businessConsumer": null,
          "extraInfo": null,
          "customReferences": {
              "custom1": "Test",
              "custom2": null,
              "custom3": null
          },
          "transactionLogs": [
              {
                  "id": "TransactionLog-eed70346-4e87-48e5-ba7b-087201e6d945",
                  "createdAt": "2025-03-06T11:23:11.01Z",
                  "updatedAt": "2025-03-06T11:23:11.01Z",
                  "status": "failed",
                  "description": "Transaction with modificationId: b4cd3 fails on its 0 resubmit because smartpay returned failure status for transaction",
                  "error": "gateway_processing",
                  "errorDetails": {
                      "gatewayDescription": "External payment provider failed to process the operation.",
                      "paymentProviderDescription": null
                  }
              }
          ],
          "criteria": null,
          "targetMerchantAccountReference": null
      }
Mandate Deletion and Subscription Termination
If a customer deletes the mandate, the associated subscription is automatically removed. Any subsequent attempt to process payments under the deleted billing agreement will fail, returning the following error:
{
    "traceId": "traceId-79103ce4-c876-4df7-8c8c-d5c4ce52127a",
    "errors": [
        {
            "message": "Cannot create a transaction for payment series without billing agreement.",
            "code": "invalid_payment_series"
        }
    ]
}
Merchants should verify the status of a stored payment option and its associated billing agreement before initiating a payment series transaction. If a mandate is inactive, merchants should not attempt to process payments until the mandate is successfully authorized. In cases where a mandate has been deleted, merchants must ensure that the customer creates a new mandate and a new billing agreement before resuming subscription-based payments.
Bacs Additional Data Parameters
Our APIs provide responses containing a variety of parameters that may change depending on the endpoint you're trying to reach. Each payment option can have distinct fields, and understanding these variations is essential for proper integration.
| Parameter | Description | Type | Max Length |
|---|---|---|---|
| additionalData | A list of "name" and "value" pairs. | Array | - |
| - dd.mandateStatus | Possible values:
| String | - |
| - dd.mandateReference | Mandate reference. | String | 18 |
| - dd.mandateInitiationDate | Transaction creation date and time. | String | - |
| - dd.mandateActivationDate | Transaction activation date and time. | String | - |
| - dd.creditorId | Creditor reference. | String | - |
| * - dd.bacsMerchantName | Merchant name. | String | 30 |
| * - dd.bacsMerchantMandateLabel | Short merchant name. | String | 10 |
* Merchants can filter and manage their Bacs transactions in SmartPay using specific parameters which allow merchants to categorize transactions and facilitate reconciliation: bacsMerchantName (max length: 30) and bacsMerchantMandateLabel (max length: 10). Using these parameters, merchants can track transactions and improve reporting within SmartPay.
Bacs Test Data
Test data is provided to support simulation of payment flows across all available payment options during integration and testing. It facilitates validation of API behavior, verification of SDK rendering, and end-to-end troubleshooting without processing real transactions.
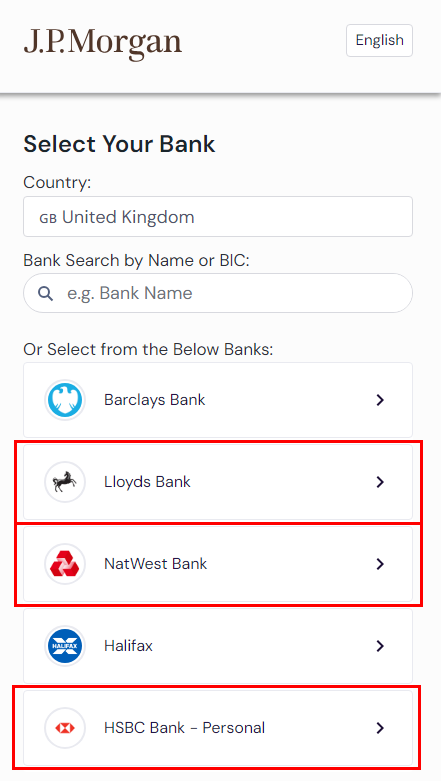
Lloyds Bank
- Username: llr001
- Password: Password123
NatWest Bank
- Customer Number: 123456789012
- PIN: characters as displayed on screen
HBSCNet Bank
- Username: customer01
- Security Code: 123456